Update April 2013: Please check out my more recent post about scrap vinegar here with photos of the stages you’ll encounter and more tips based on my experience making successive batches of vinegars.
I’ll go ahead and just put it out there first thing. This is a project wherein everyone who lives under your roof needs to be enthusiastic, unless you have some sort of out-of-the-way cellar or garage that stays at or around 80 degrees F. You’re making vinegar. It’s going to smell like vinegar after about a week. Be warned.
There’s no specific recipe for this as you can make as small or large a batch as you have scraps.
My first batch of cider vinegar came from scraps that started out as apples simmered in water and then pureed through a food mill. I took a chance on the mealy skins and chunks, hoping that cooked vs raw would provide sufficient apple-ness in my soon-to-be vinegar.
It worked for me, and I’m now working on another batch of cider vinegar, but this time with raw scraps. I’ll post an update after a month to let you know how it goes.
This method is based on Sandor Ellix Katz’s fruit scrap vinegar recipe from his fablulous book, Wild Fermentation.
Homemade Apple Cider Vinegar Recipe
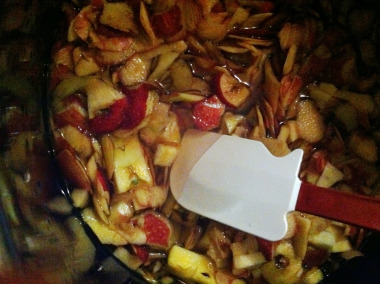
1. Save those cores and peels from pies and apple preserving projects. Use organic apple scraps, or know your local apple grower’s spraying policies. For your first batch I’d recommend using between 5-10 apples’ worth of scraps. Use your cooked, apple butter scraps if that’s what you have. Freeze your scraps from smaller projects if you’d like and just use frozen scraps as you would with fresh (don’t worry about defrosting).
Place your scraps in your widest-base, food-safe container. Avoid aluminum or galvanized steel; the acidity level will rise as your vinegar ferments, you don’t want metallic compounds in your salads and marinades. An enameled stone crockpot bowl would be ideal, but stainless steel, food-grade plastic tubs or enameled cast iron/steel are good vessel options. Whatever you use, make sure it’s something you won’t need for at least one week.
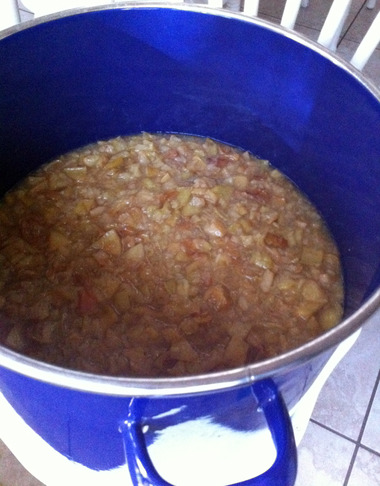
2. The volume of sugar water will depend on how many scraps you have. Dissolve 1/4-cup sugar in 1-quart water. If that doesn’t cover your scraps then multiply that ratio by as many quarts as you need to completely submerge your scraps in sugar water. For the batch I started yesterday with scraps from 20lbs of apples, I needed 13 quarts of water with 3-1/4 cups sugar to cover my scraps. (Out with the trusty lobster pot/canner pot, again.)

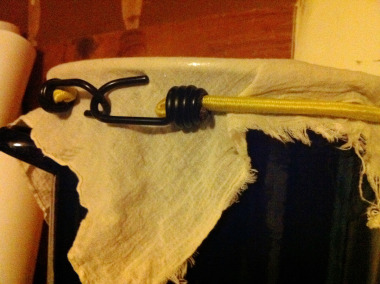
3. Cover your pot with cheesecloth and let sit for one week. Be sure to swirl the pot or stir the scraps daily or mold will form on the surface. A good fermentation temperature for vinegar is on the warmer end (80 degrees F); if it’s cooler in your house expect the process to just take longer.

4. After a week has elapsed, strain out the scraps. Sandor said the liquid would darken, but mine didn’t really. I think that’s the product of my using mush, post-puree leavings; my liquid was always sort of cloudy. It did bubble over the week, though, a good sign that bacteria and wild yeasts were eating sugars and producing carbon dioxide (yay fermentation!)

The larger batch you do, the more straining prowess and ingenuity you’ll need. My juicing/straining tactic for jelly’ing came in handy.
5. Return your strained liquid to a vessel large enough to contain it. Maybe that’s what you had the scraps in initially, or maybe you’ve found an even better vessel to free up your dual purpose lobster pot/canner pot for preserving other things.
Again, more exposed surface area with air will benefit your vinegar fermentation. Cover with cheesecloth (to keep fruit flies out of your vinegar) and let the liquid ferment over the next 2-3 weeks. Peek and give it a swirl every few days to make sure everything’s okay in there. It’s done when it tastes like cider vinegar. Be brave, give it a little slurp.
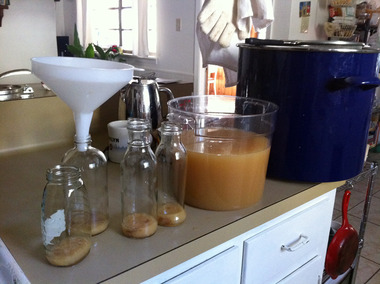
6. Bottle your vinegar and use it like you would store-bought, except for in waterbath canning. Don’t use homemade vinegar for pickling or preserving food in jars you plan to seal and store at room temp. Acidity levels in homemade vinegars will vary and a simple pH test strip might not give you a reliable reading of the pH of your vinegar. Be safe my friends. (I’d use this vinegar for pickles you make and keep only in the fridge, though.)
I scooped up some of the ‘mother’ (see below for more info) and put some in each jar. You can strain her out if you’re not cool with live bacteria keepin’ it real in your jar. Check out Bragg’s for further reading on this topic.
Things I learned from my first batch:
1. I didn’t have a control group, nor any prior experience to base it on, but my feeling is that there was less sugar in my cooked scraps than had I used raw scraps, which is why it took about two weeks longer for the vinegar to ripen. It could also be because I made quite possibly the largest batch one can manage in a home kitchen with regular home containers. I also cooked out some of the naturally-occurring yeasts & bacteria that helps the fermentation process along. All this is to say, I’d probably just use raw scraps in the future.
2. This is not like making fermented pickles where you want to skim religiously, daily. As mentioned earlier in the post, at one point midway through the post-strain ferment, it got hot in my house (about 80 degrees F) and small clusters of mold formed on the top. As I skimmed those (definitely skim those), I noticed a film forming and thought I needed to skim that, too. Turns out that that’s the mother. It eventually sinks and grows. Not gross grows, just becomes more like what you’d see in a Bragg’s bottle. I made a mother!
3. I definitely need more vessels and one can never have too much cheesecloth. Floursack towels make great cheesecloth substitutes.
If you give this a try, I’d love to hear how it goes for you.
Good questions from Klynn:
“I had previously read that yeast must be added, but apparently this is not so? Also, What do you do with it when it’s done? Can it be stored room temp or should it go into the fridge? And does it need to be processed before storage?”
No added yeast, as we’re relying on wild yeasts in the air, which do their job superbly. When it’s finished, store it in clean smaller bottles (or in one large one) capped at room temp. The yeasts and Acetobacter have eaten all available sugars and produced a shelf-stable vinegar. Processing it will kill the live microorganisms. Raw vinegar will last indefinitely, but the flavor will evolve over time.


