
Our new kitchen pretty much trumps all kitchens in my checkered past of rental kitchens. I can teach baking and preserving classes right out of my home now since the living room sidles up, open-aired and glorious, to the miles of countertop I’ve been blessed with in our new East Austin abode.
With all this space and openness comes the counterweight downside: nearly nil cabinet space. Last weekend I conjured my inner Julia and Paul and hung a pegboard along the backsplash wall in our kitchen.
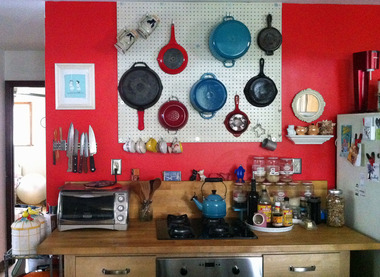
This project is moderately difficult done solo (like I did it, because I just couldn’t wait for my J to come home later that night), and requires more careful attention than technical skill. The only major tools you’ll need are a drill and and perhaps a screwdriver and pliers.
Tips for Hanging a Pegboard in the Kitchen
1. Renters, call your landlord! Done properly, this pegboard is going to leave its mark on your wall (usually in the form of anchors that won’t come out without punching them through). You don’t want to compromise your deposit by charging forward without permission. UPDATE 12/2014: Put in writing an agreement that is signed by both you and your landlord detailing permission for the project. Our verbal phone call of permission somehow dissolved and our former landlord knocked money off the deposit after they also changed their word on telling us to keep the pegboard up; tearing the pegboard down caused wall damage that we were then charged for. Yuck!
2. Measure measure measure. First off, find your studs; they are usually spaced 16” or 24” apart, though I say “usually” very loosely here; my kitchen wall appears to break the mold with 48” between my studs, and oddly placed electrical outlets on those studs. I have no doubt that standard is probably not the norm at all amongst all the different types of kitchen/home/apartment constructions out there.
In order to fit my intended area, I had them cut the 4’ x 4’ pegboard at the hardware store to measure 46” x 39” because I thought I was hanging it vertically instead of horizontally. Ideally, you’ll want to measure and tailor your board so that you have a stud along each side and down the middle. Had I to do it over again, I think I’d have kept the pegboard whole to span the exact distance between the studs. Live and learn, eh?
What to buy: 3/16” x 4’ x 4’ sheet of tempered hardboard, brown or white (I got a brown one and paid $8.27.)
3. Use 1” x 2” x 8’ framing pieces, cut to the size of your pegboard, to create a small space between the pegboard and your wall. This ensures that the hooks will fit properly on the backside.
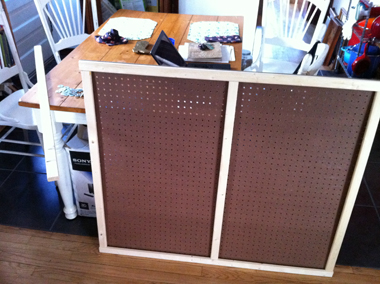
You don’t need to construct the frame in advance (it’s just resting against the board above). I laid the pegboard down backside facing up and used a Sharpie to mark off on the framing boards where the other boards were to meet it. I constructed and secured the framing pieces on the wall one by one using the studs as my guide.
What to buy: 15 - 1.5”-long flathead wood screws that will fit flush with the outer surface of your framing planks; ~3 planks of 1” x 2” x 8’ framing pieces (For my trimmed down pegboard, I used the better part of 3 of these planks, which were priced at $1.12 each.)
4. If your wall doesn’t meet standard stud spacing, like mine didn’t, you’ll need to anchor the portions of the framing that sit on hollow wall areas. Use a heavy-duty toggle bolt for any areas that are not lined up with a stud and use smaller, plastic or metal collapsing sleeve anchors to secure the rest of the length of the framing piece to the wall. (The toggle bolt will only anchor it to the wall in one spot, I recommend affixing the framing boards to the wall in at least three places, using lighter-duty anchors is fine here only if you have the heavy-duty toggle bolt in place.)
Word to the wise: Position but don’t put the screws in your smaller anchors before the toggle bolt; I recommend drilling a hole in the framing piece and the wall, but slide the framing piece out and put the plastic anchor sleeve directly in the wall. This prevents your anchor from just pulling out and making a mess of everything (I speak from experience here) because it was unable to do its job lodged within the framing piece.
What to buy: If your wall requires it: Pack of 2 toggle bolts (mine cost $3.70), pack of plastic or metal sleeve anchors that fit around your wood screws
5. Paint your pegboard, front and back. Not only for aesthetics purposes, but also to seal the hardboard material. A kitchen pegboard is bound to experience water and oil drips, so a paint seal will ensure the material doesn’t blister and come apart after a few months of use. Use a high- or semi-gloss finish enamel so you can clean your pegboard easily.
I recommend painting the pegboard before you hang it. Start by painting the backside of the pegboard (the side that won’t be face out) first as paint will get lodged inside the holes and you’ll need to poke through with a skewer and then smooth the mess that dribbles down on the opposite side.
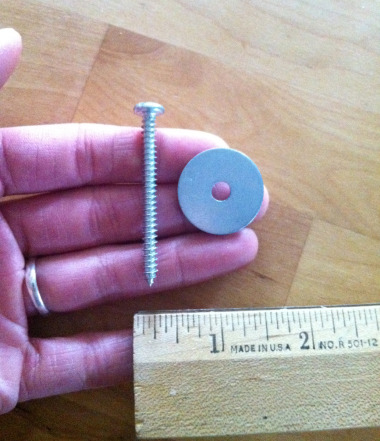
6. Buy screws for securing the pegboard to the framing that are at least 2” long and washers that are 1” wide to help distribute the weight of your pots and pans along the anchored framing. Ideally these screws should be the same size as your anchors (if you need to use them), but it doesn’t matter if you’re screwing directly into studs.
I had an L-shaped stud situation to work with (along the top and lefthand side of my board), so I screwed the pegboard to the framing slightly disproportionally, using a few extra screws on stud portions.

You can see above that I used 4 screws along the top plank (stud), 4 screws along the lefthand side plank (stud), 1 along the middle, which was aligned directly with the toggle bolt anchor (hollow wall), 1 along the righthand side also aligned with the toggle bolt anchor (hollow wall), and 2 along the bottom plank, also hollow wall, but secured to framing which is anchored in two separate spots.
What to buy: 12-15 - 2”-long roundhead screws; 12-15 - 1”-wide washers
7. Hang away! If you have a few hollow wall spots in your set-up, be sure to place your heaviest items closer to the areas where you have a stud or the heavy-duty toggle bolt. Use only the larger, 1/4” hooks vs. the smaller size to ensure a snug fit.
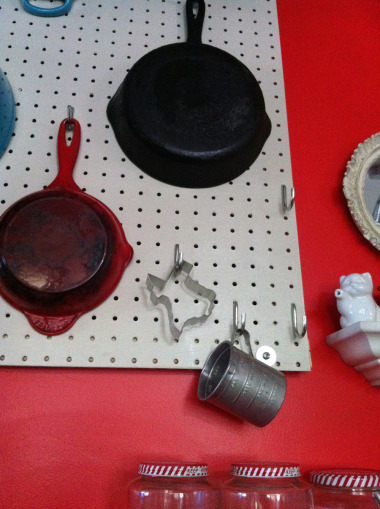
What to buy: pack of assorted 1/4” hooks or hit up smaller hardware shops like ACE or your local shop to find individual hooks or packs of just the type of hooks you need (the big box hardware stores only sell the assorted packages).
Let me know how it goes for you!