In honor of summer’s arrival last week, I ordered 40lbs of tomatoes from one of our local organic farms, 25lbs of San Marzanos (a paste variety similar to a Roma or plum variety) and 15lbs of a standard red round. They arrived Friday morning and sat under my kitchen table until dia de los tomatoes on Saturday.
I converted two boxes of tomatoes into 7 pints of stewed tomatoes, 4 quarts of canned tomatoes, 5 half-pints of Marisa’s spicy tomato chutney (enter to win her book here). And I decided to dehydrate the last five pounds for a handy umami kick to sauces, soups, pizzas, whatever. As I prepped for the project, I remembered consulting Audra of Doris & Jilly Cook a couple years back when we got a bunch of cherry tomatoes in our CSA in Brooklyn.
How to cut the tomatoes
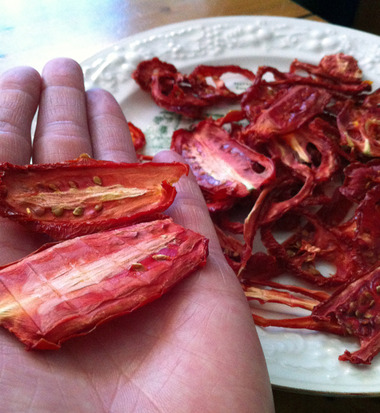
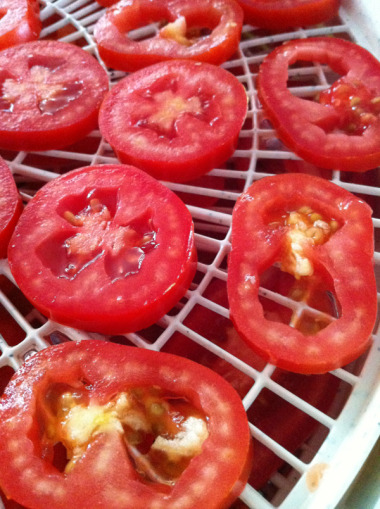
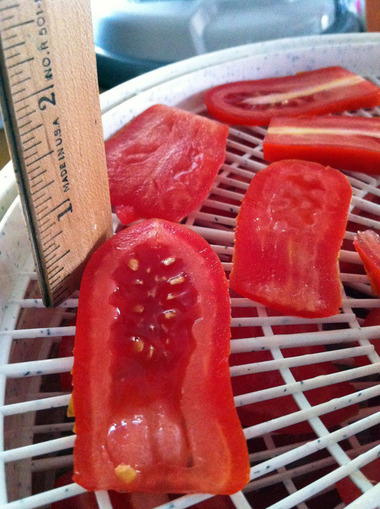
For the plum varieties, I experimented by slicing the tomatoes a few different ways, in horizontal rounds (pictured above), long vertical sections and a few long slivered slices from tomato-cutting gone wrong. I found that cutting off the stem end from the fruit and slicing into them from the cut end into long sections (pictured below) about 1/4” thick was the winner of the drying contest. They dried most consistently and were the first batch to finish.
Slicing the tomatoes this way can be tricky as the seedy bits want to ooze everywhere, just be patient and if you end up with oozing, just drop the seeds onto one of the sections that didn’t contain any after slicing (or just ditch the seeds entirely).
The round sections became very small and had a tougher consistency, and the slivers just curled up on themselves and turned into tomato sticks, good candidates for being ground up in the spice grinder and sprinkled over stuff.
I have a Nesco dehydrator (this one) and about 2.5lbs of plum tomatoes fit on my 5 trays, which may vary based on your equipment.
More than half of the tomatoes in my first batch were ready after 12 hours at 135 degrees. As with just about any dehydrating project, you want a texture that’s pliable, but not sticky. I returned to the heat half of the trays I started with to finish up the still sticky tomatoes with a few more hours. Molds can form with moisture; it’s no fun to lose your batch a week after you drop it into a jar.
June 2013 Update: This year’s tomatoes haven’t been plum tomatoes and I’ve successfully dried a few batches so far. Instead of keeping skin on I peeled the larger tomatoes (I’d say don’t bother with the Juliets and smaller varieties, just slice in half from end to end). I loved the results of peeling the tomatoes. It took only 6 hours to fully dry the skinless slices. To prepare the slices I tried to keep them within 1/4-1/2” sections and I ditched all the gooey seedy bits. The sections were uniformly dry and tasted great.
As you’re packing finished tomatoes nto a jar or air-tight bag for storage, do one final check to make sure there aren’t any remaining sticky or tender spots. Store them in a cool, air tight container for up to a year.