Freezing citrus zest

The bounty of citrus in winter months never fails to incite frenzy to save every bit and bob from these fragrant fruits. I taught this workshop over the weekend and have many posts on the blog (here, here and here to name a few) dedicated to using up citrus from rind to seed.

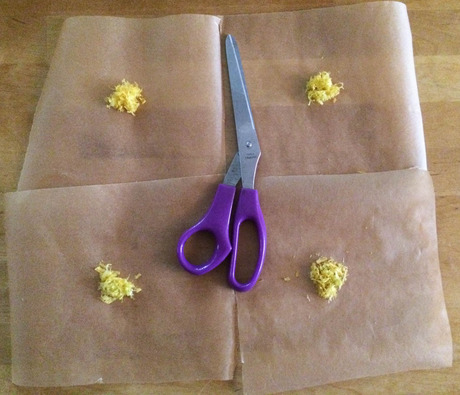
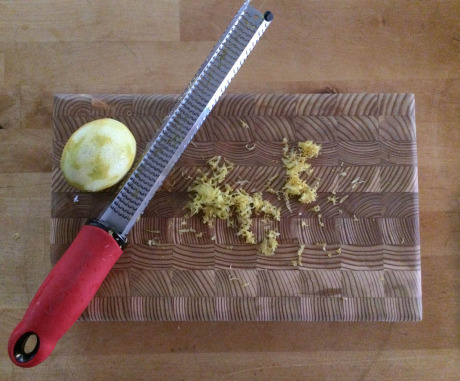
Freezing zest is a great way to add bright, freshness to your baked goods and dinners throughout the year when your citrus bounty is nonexistent. Start by zesting the fruit. Then cut out a few 6” x 6” parchment paper squares and divvy the zest into 1 tsp measures onto the papers. Fold them up tightly.

Wrap your folded packets in a piece of tin foil (and don’t forget to date them!). Throw this bundle in a freezer bag for one more layer of volatile oil protection! Try to use these within 6 months for maximum zing.

Defrosting on the fly

The last hip trick was all about freezing stuff, so this week’s post will be about unfreezing. Ah, defrosting. Leisurely defrosting is the kind of thing people who plan ahead do. To be one of those kinds of kitchen people, I strive. 

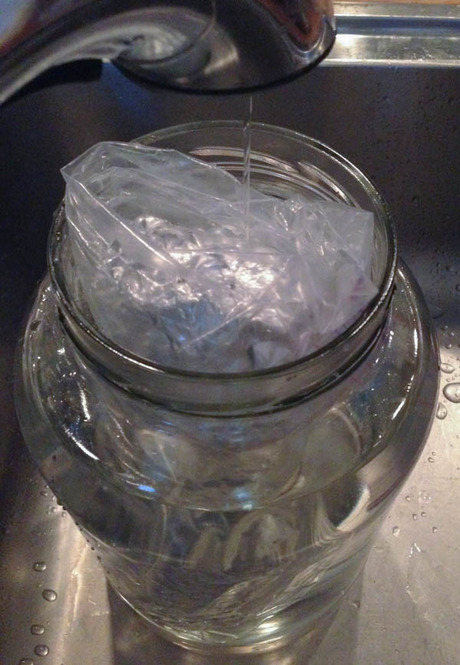
The plan-ahead people will usually safely defrost by just putting something in the fridge and cooking it the next day when it’s fully defrosted. Well, for the non-plan-ahead types, running something under a tiny stream of cold water (for a maximum of 2 hours) is also an acceptable way to defrost, and quickly at that. However, I don’t feel so great about letting all that water trickle down the drain.

I used a gallon jar (another great way to use them around the house) to capture batches of water as we defrosted some fish filets last night. Yes, you have to periodically monitor the progress of the jar, but your houseplants (or trees or garden) will be so happy you did.

Eliminating Freezer Burn

This freezing trick comes as an addendum to a great tip I learned from my friend Kim O’Donnel, who was in town teaching classes last weekend. Enjoy this two-for-one hip trick deal!

I inherited from a market demo an excess quart basket of overripe tomato seconds (the not-pretty, but still great eating variety), and with these tomatoes I made tomato paste. Kim said to peel and seed then puree the tomatoes, line a rimmed baking sheet with foil and bake in a low oven (200) for an hour or two until the water evaporates and you’re left with tomato paste. 

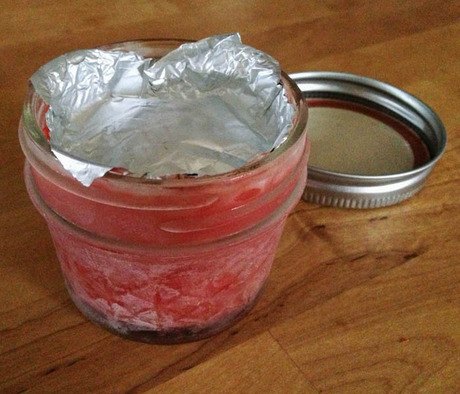
Store this or any freezer-bound goods in a straight sided mason jar (to allow ice crystals to evenly expand upward and prevent jar breakage) and top with a little piece of foil to eliminate air from coming into contact with the surface of your food, thus cutting down the odds of freezer burn. (p.s. Yes, this is precisely a reiteration of this very hip trick, but less the plastic touching your food, score!)

Update: A couple hip readers mentioned that the foil might leach aluminum into acidic foods (like tomatoes!) so maybe a small round of parchment paper would do best? The trick would be to cut it just right so it sits completely inside the jar rim and fits on top of the food without bubbling up and causing a pocket of air between food and parchment.

Cold-brew tea

Summertime heatwaves mean my desire to even boil water goes lower on the list than folding laundry. This hip trick is a reminder that you don’t need hot water to make tea. Let room temp or cold water, tea bags or loose tea, and a little time in the fridge work for you.

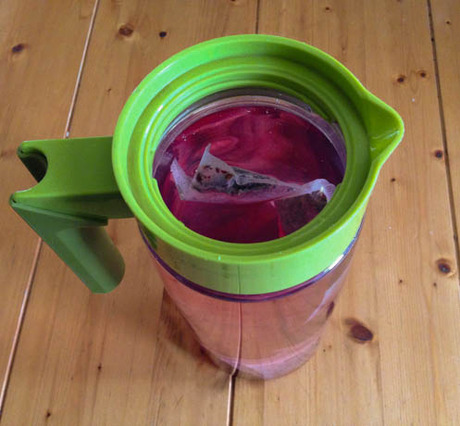
I love cold-brewing and wrote a post about it with ideas for fun cold brew infusions. The pitcher pictured above is about 2 liters’ worth of water steeped in the fridge overnight with 5 blueberry teabags. Voila, blueberry iced tea.


Peeling garlic cloves

This hip trick comes to us courtesy of my brother-in-law, Nick, and a recent reminder from Hank Shaw. I’m constantly fermenting garlicky dill pickles, my favorite flavor combo, and when the garlic stares me down I now use a trick that works sort of like magic. 

You can do the original method, finding two metal bowls of roughly the same size and then sticking the broken apart, but unpeeled garlic coves inside one of the bowls. Make a dome over that bowl with the other, hold really tight and shake wildly. Remove the peeled cloves and shake it out until all of them are relieved of their dry skin. 

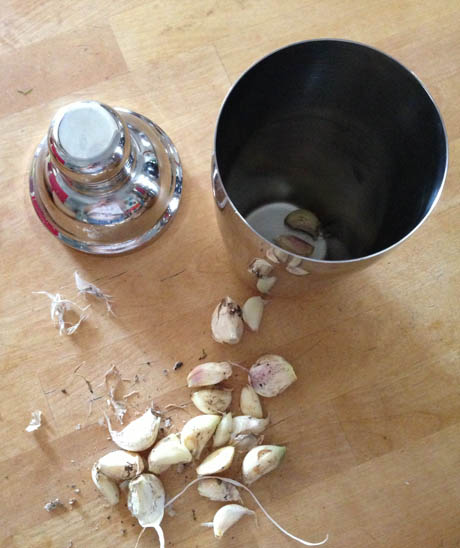
I tried this in my metal cocktail shaker and was surprised by how well it worked, and within something I’m used to shaking with ease (the bowls can be unwieldy). Make sure you clean it out really well with hot soapy water before you make your next round of margaritas, though!

Mason jar flower arrangements

I’m always sticking flowers in jars, which make great vases. That is unless you have the kind of flowers that don’t stay standing upright or enough of them to wedge into the jar so they stay and look just how you’d hoped. 

Use this trick that I know I didn’t invent, but have no credit beyond necessity during a demo at the Union Square Greenmarket a few months ago when I was presented with lovely spring tulips, a notoriously fragile and support-needed kind of flower. 

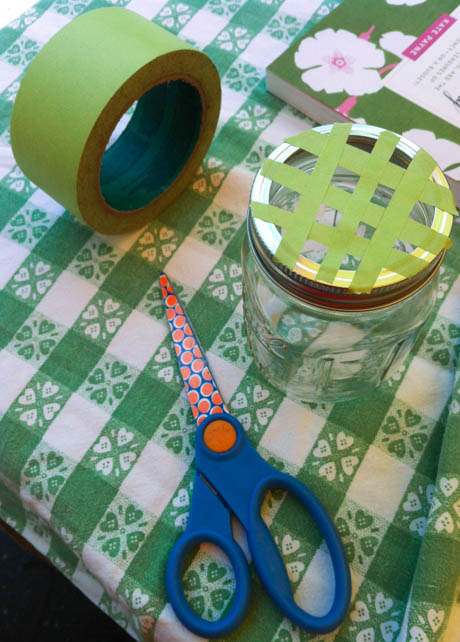
Make a grid out of masking tape that will disappear as you populate it with different sorts of flowers. The grid also lets you work in taller flowers that would otherwise fall over. If you use the mason jar band as the base from which you start taping, you can remove it and re-use it for future arrangements.

Ginger peeling made easy

I learned this tip from students at the Auguste Escoffier School of Culinary Arts, where I teach preserving classes to students in the Farm to Table Experience.

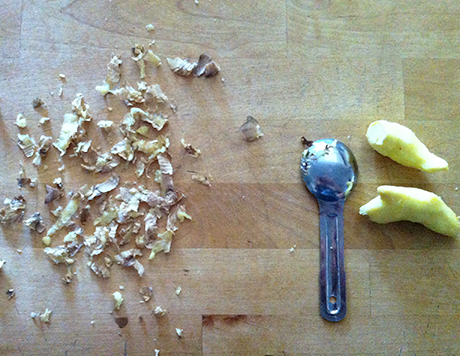
Skip trying to carve the skin off your ginger with a paring knife; you’re likely trimming away valuable ginger. Instead, take a teaspoon and scrape downward with the tip of the spoon (where you eat from) in small strokes as if you’re whittling. Ginger freezes well, peeled and unpeeled, and you can use this peeling tactic with a frozen hunk of ginger as well.

Make the most of our water supply

We’re in the midst of a 5-year drought where I am in Central Texas, so water conservation is at the top of our home lists. No matter where you live, it’s important to keep tabs on water usage. Here’s a hip trick provided courtesy of our county extension horticulture agent, Daphne Richards:

Many people capture the cold water from the sink or the shower while they’re waiting for it to heat up, which is great, but you can also capture water while you shower. 

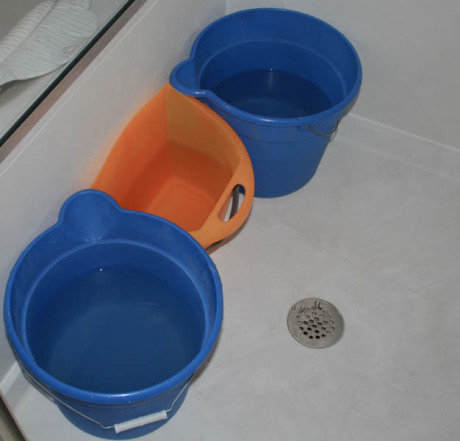
You just need a few buckets and you can capture several gallons of water every time you shower. This may not sound like much, but in our continued drought, a few gallons go a long way. In my shower, I use two round buckets, but the real key is the flat-sided bucket that I put between them. I can press the flat bucket up against the back of the shower and catch all of the water that misses me and bounces off the wall. I catch about four gallons per shower, which I normally use on my oak trees in the front yard. 

A friend recently asked about soap in the water and whether that would hurt my plants. Well, most of the water that gets into my buckets has totally missed me, and so doesn’t have any soap in it. But even if the water WAS soapy, it wouldn’t hurt anything. The concentration of soap would not be that high, and soaps these days no longer contain phosphates, which used to be a problem. 

Taming the spice stash

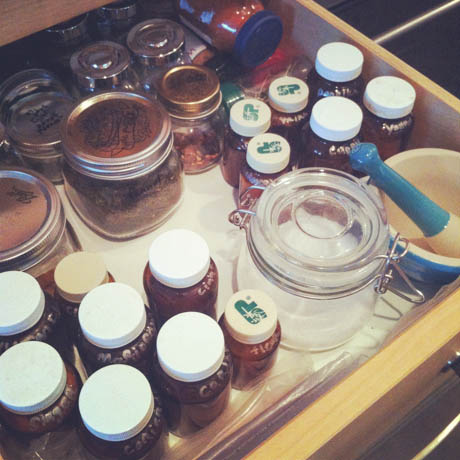
I was delighted when a friend brought me a bunch of little glass vitamin jars last year. With a little citrus oil (to remove gunky labels) and a bottle brush to give them a good interior cleaning (and rid them of their previous inhabitants’ odor), I was finally able to create homes for the lingering spice bags in our drawer.

When considering containers for reuse keep in mind that they should be glass, and, if possible, opaque to keep light from taking a toll on freshness. Add a few shakes of baking soda, fill with hot water and soak overnight to rid odor from persistently stinky jars. 

Use a metallic sharpie for labeling the glass jar; erase with rubbing alcohol if your containers’ contents change.

Let there be light

Turn a dark corner into a radiant and unique place to plop down and read or sip or chat.

Since renting out our spare room, we are short one lamp and haven’t found a suitable cute (and affordable) replacement. Rather than hiding on the dark side of the living room, we opted to fill a vintage gallon jar with christmas lights to create a luminous object lamp, an objet d’art, if you will. 

Other great vessels for this kind of lighting arrangement include glass water pitchers, large glass pickle jars (if not full of fermenting carrots), or colored glass vases or jars.

Spruce up your sips

Add some pizzaz to a water pitcher on your holiday table by adding any type of organic citrus peel sliced into strips. Using an organic fruit is important because pesticides and residues aggregate in the peels, but the good news is you only need one organic fruit to make a few pitchers of infused water. Thin skins—found on oranges, lemons, tangerines, clementines, etc.—work best to keep the water from developing a bitter flavor.

The infused water, which I usually let sit for a few hours in the refrigerator prior to serving, is a vibrant and anti-oxidant rich way to sip, packed with vitamins and minerals from the citrus peel and pith. Refill the pitcher a couple times if neccesary, starting with a new peel after 24 hours of use. Alternatively you can add strips of fresh peel to a pot of tea for a warm infusion.

Read this post for a ton of other ideas for creative ways to use citrus peels.

Turn scraps into gift tags

Spruce up holiday gifts this season with simple, sweet gift tags made from scraps of paper.

Make this beveled shape by docking the corners and hole punching or trace around a canning jar and make circular tags. Use kitchen or other twine or spring for a roll of pretty striped gift twine, fold string in half and feed it through the hole. Feed the ends of your twine through that loop and voila, gift wrap with some handmade flair!

Make pie, not waste

This hip trick comes to us courtesy of my friend Ashley English, kitchen, home and small-scale farm diva over at Small Measure and author behind a whole bunch of great books, including A Year of Pies (which features one of my pie recipes!).

Ashley shares with us this ‘tis-the-season, pie-related hip trick, “Most pie recipes tell you to form the pie dough into two balls, wrap them in plastic, and then place in the refrigerator or freezer. I hate waste, and, as such, never use plastic wrap. Instead, since most recipes call for two sticks of butter, I hold onto the butter wrappers, and then sandwich them in between the flattened dough disks. The dough disks, cradled inside their butter wrappers, then either go into a lidded glass container (my typical M.O.) or a resealable plastic bag (which I’ll clean and use over and over again). That way, the dough disks don’t stick together and I’ve eliminated the need for plastic cling wrap at the same time. Win-win!”

DIY knife block

This hip trick comes to us courtesy of Paula over at Springdale Farm, not too far from my house in East Austin. I was recently in Paula’s kitchen for the Austin Food Blogger Alliance’s cookbook photo shoot and this little gem came to my attention.

Paula told me about how their lovely knife block was an idea she saw in a magazine. They personalized the idea with a box that’s made from shiplap wood from their home’s renovation. Your box can be something personalized like this, or even a repurposed vintage container/jar you love filled with wood skewers. If your proposed knife block container is shorter than the skewers, just snip the skewers with a wire cutter and place them cut-side down in the container so they’re flush with the top.

Add ventilation to your bathroom, sans remodel

Living in older houses has its perks, charming features, beautiful floors, big windows; however, the bathroom often leaves much to be desired. Old house bathrooms are usually without any ventilation. We rent, so a bathroom remodel isn’t in the cards for us.

Adding a small fan to the mix makes that small, intimate space a bit more suitable to modern living and our desires modern comforts. In those old light fixtures, there’s usually a plug that’s directly linked to the light operation. We set our little fan atop the fixture itself; it switches on when we flip the light switch.

Put a pull on it

You may recall a hip trick from a few months back telling you to be on the look-out for roadside find pulls. Here’s an idea for using a drawer pull as a creative hook alternative. 

You’ll want to be sure to find a beam and drill directly into it in order for the pull to remain sturdy and useful. Use a drill bit slightly smaller than the base of your pull and drill about 1” deep. Screw the pull into the drilled hole. If a beam doesn’t line up with where you want to place hooks, then use a cute piece of wood as a base to drill then screw in your pull(s). (You can use long drywall screws or a hollow wall anchor to affix the wood piece to the wall.)

Voila, instant cute and creative pegs!

Cleaning with vinegar, without the smell

I share this hip trick with my Green Your Cleaning Supplies workshop attendees. Do you like the idea of cleaning with something non-toxic, but hate the smell of vinegar?

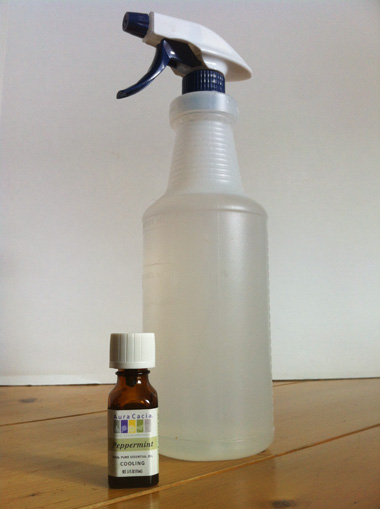
Peppermint essential oil to the rescue! Add about 10 drops of a pure essential oil (no synthetic fragrances or you’re defeating the purpose of non-toxic cleaning) to your half vinegar-half water spray bottle. Of all the essential oils I’ve tried, peppermint is one of the few that actually masks the odor of the acetic acid in vinegar. Not a mint fan, try clove or eucalyptus which are also strong oils. 

Give a few sprays to your counter top, bathroom mirror, sticky floor and voila; you’re cleaning with a Thin Mint.

DIY plant trellis

This hip trick is featured on page 168-9 of the book (in both print editions!) See what a fine job Agent Meredith did of illustrating?!

No matter your garden or plant scenario, you can create a quick and easy trellis from an existing deck or railing structure to train new growth and vines up. You need a bit of jute twine and a dowel or anything long and skinny and relatively light to form a ledge. Follow the method on page 168 of the book for tying the twine tightly around both the dowel and the railing or structure, or just wing it (seeing as there’s no one right way to do this)! 

Non-toxic bug repellant

This hip trick comes to us courtesy of Nicole of Fairbanks, Alaska-based blog, Arctic Garden Studio. I got a taste of the monstrous mosquitoes Nicole deals with regularly in her work with the Alaska Bird Observatory (or rather, they got a taste of me) when we toured Creamer’s Field bird refuge. If she says this works, I believe her and plan to try it on our Texas-sized mosquitoes!

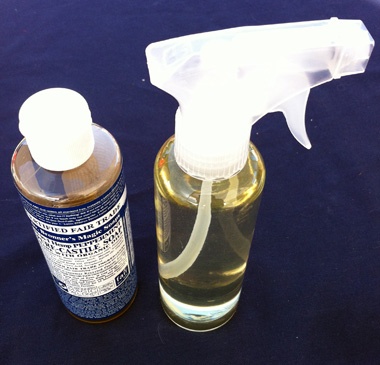
Take a small spray bottle and fill it halfway with Dr. Bronner’s peppermint Castile soap (or use unscented Castile soap plus 10 drops of peppermint pure essential oil), fill the bottle the rest of the way with water. Nicole recommends spraying it on and rubbing it in. There’ll be a slight residue, which also helps keep the bugs away. Not down with mint? Try lavender; it’s another bug un-friendly scent.

Added bonus, you can also use this spray bottle to get rid of aphids and pests on your garden plants!

Blueberry infused vodka

Take your summer celebrations up a notch with a handful of blueberries sliced in half and dropped right into a 375ml bottle of vodka, or use a cup of sliced berries for a 750ml bottle. (Don’t break the bank on your infusing vodka, a low-end vodka is a perfect base.)

Let it sit at room temperature for a week (or for up to three). Strain and enjoy with club soda, lemonade or your favorite fancy flavored soda. Store at room temp or in the freezer.