 What a treat to be invited into Jessica Hannah’s magical perfumery. She focuses on custom-blended natural perfumes, via private consultation and in her workshops for the public. As of this week she is still currently based in Austin, TX, but next week she’s headed to San Francisco to set up shop both personally and professionally.
Jessica’s perfumes are based on 100% natural ingredients (essential oils and absolutes, tinctured bits of nature) in a pure alcohol base, the way perfumers have been crafting them ad infinitum. Synthetic perfumes have only been around for the past 100 years or so. Many synthetic scents also happen to rearrange how our bodies and brains perceive things. (Check out chapter 5 in Hip Girl’s Guide to Homemaking to understand more about endocrine disruptors and why fake scents bring no good to your home and body.)
I’ve not been much of a perfume person ever since my home toxins research; I lumped all perfume into the synthetic category and as it turns out completely missed how perfumers have created scents naturally since the beginning of forever.
Jessica Hannah has a background in art and performance art—connecting sense to experience, which is coincidentally exactly what perfuming is all about. A performance piece Jessica created for a school project piqued her interest in scent; she dove in from there, whole-nosed’ly.
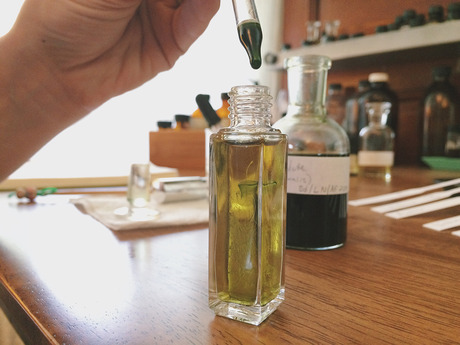
Jessica’s perfumes follow a standard structure with three ranges of notes, the top, mid and base comprised of 8 drops for each in just shy of 1 oz base organic grain alcohol. She explained the notes to me with the top as your introduction, bright and volatile, or a smooth beginning. The mid is the heart of the matter, it can be floral or go any other direction you choose. The base is like a bass note in music, what’s underlying, below everything. It can be dirty, ancient, roots.
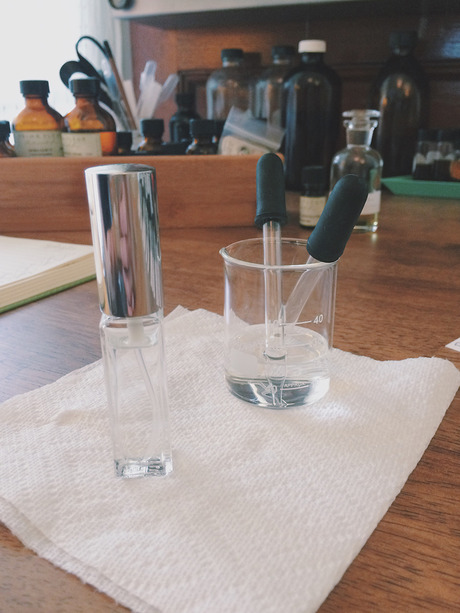
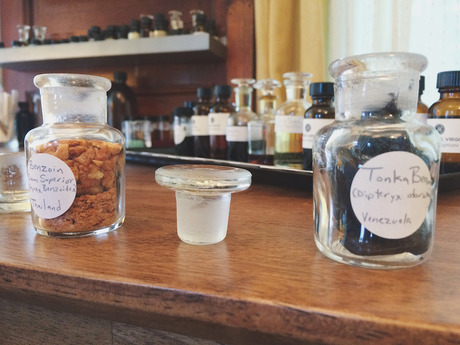
She also gave me a great overview on absolute vs. essential oils. Essential oils are either steam distilled or expressed. An example of an expression is citrus oils that are cold-pressed (like a good olive oil!). During distillation a hydrosol is also produced during the process. Absolutes and a waxy residue with a lot of staying power called a concrete are solvent-extracted from the plant materials and it’s a multi-step process. These tend to be much more expensive. Here’s a link she recommended if you’re interested in learning more about these processes.
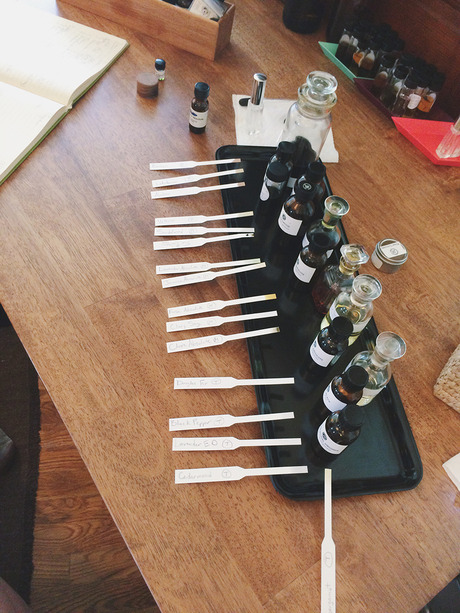
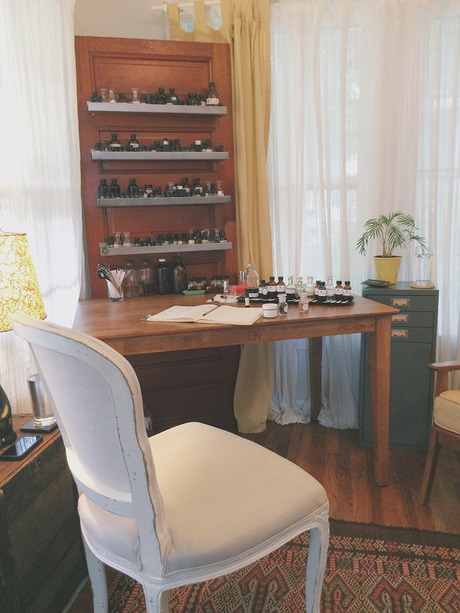
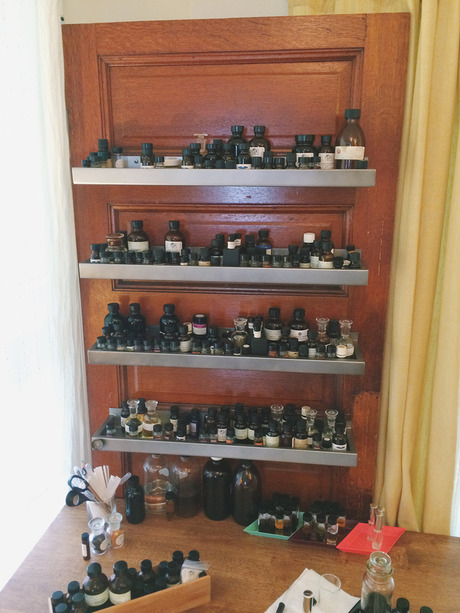
I loved learning about all of the tinctures, oils, absolutes, concretes and scent materials she prepared for me, all the things that comprise her perfumers organ, a fancy term for where she stashes her scent components. I adore her DIY door-turned- perfumers organ.
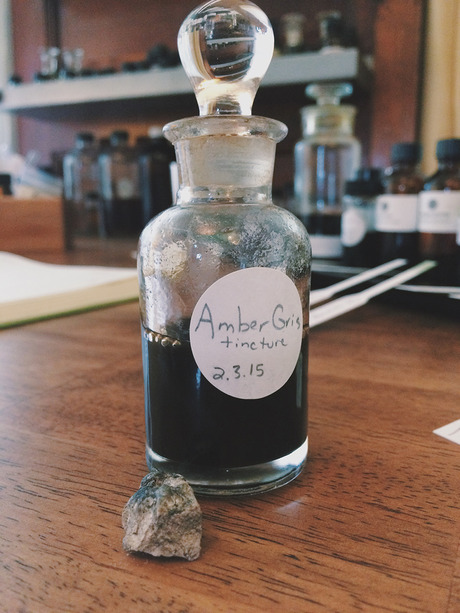
I also learned that perfumers rely on interesting things (like whale poop! Amber Gris, see below) for base notes. (Yes, there are vegan alternatives for these notes.) My custom perfume has notes of Douglas fir (absolute), sandalwood, lavender, jasmine and more.
Our chat over science, scent and our creative process was like that of long-time friends reconnecting despite the fact that I’ve only met and hung out with her once before. One of Jessica’s mentors gave her the excellent advice that I continue to run on repeat in my mind when I face creative roadblocks, like too much inspiration (aka look how well everyone else seems to be doing this thing I do) or future fears (aka what’s my vision for all this?):
Just shut up and do your fucking work.
YES.
What great advice. Perfume can engage, soothe, excite, calm, etc. (the science of how our bodies react to aromas is fascinating), but getting to know Jessica has been like the experience of the perfume she crafted for me, soothing, reassuring, vibrant and connective.
Jessica has offered up one of her hand-crafted perfumes for a lucky reader. Jessica gave me a bottle to mail off to one of you lovelies of her Limited Edition Poolside Mimosa: A gorgeous floral and woody aroma reminiscent of tranquil poolside lounging. Contains notes of Mimosa, Blood Cedarwood, Jasmine, Ylang Ylang, Sandalwood, and Angelica. U.S. residents only please enter via the widget below. Follow Jessica via Instagram or Facebook, too!
Click here to enter if widget does not appear