Your first canning project
 You couldn’t kill someone with this recipe if you wanted to. This might be one of the safest canning recipes you could possibly assemble besides a straight-up citrus marmalade. Botulism spores can’t activate in this jar because it’s too acidic.
And, I’m going to make the bold assertion that you can’t mess it up. The joy of jam making is that no two batches will ever be alike. Subtleties of chemistry and uncontrollable factors like humidity and barometric pressure, ripeness of fruit, your attitude on the day you’re making it all factor into the way a batch of jam turns out. This tenet is a bane for people who want to make the exact same thing every time (which is why even the jars at the farmers market almost always have commercial pectin in their ingredients lists; large-scale canners can’t afford to be flexible with their sets). But your name isn’t Smuckers, now, is it?
I made this jam as a test recipe before our Brooklyn Canvolution party last weekend. Same plums, same crabapples, same everything and the second batch (made at the party) was completely different.
Time to get crackin! Use any type of plums you can find. I got a hot deal on an assorted mix, most resembling a Japanese variety, but there were some red and yellows thrown in to shake things up.
Plum lemon jam
yield 1.5 pints
1. Simmer in your heaviest-bottomed pot for 10 minutes over med-low heat:
1.5 lbs plums, pitted and chopped
5-6 small, unripe or marginally ripe crabapples whole (or skin any unwaxed variety of apple, eat the apple and put long strips of skins in the pot, not shards)
1/4 cup water (if plums aren’t very juicy)
2. Add to pot:
1.5 cups sugar (I used raw, otherwise known as evaporated cane juice)
1/2 lemon zested
1 Tbs lemon juice, strained
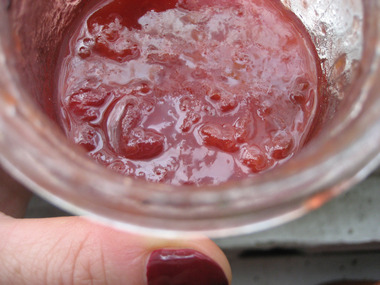
Keep heat at medium-low until the sugar dissolves completely. Use a potato masher to crush plum pieces and even out the consistency.
3. Raise heat to med-high. Mixture will need a full, rolling boil for 10-12 minutes to reach a set. Stir every couple minutes to make sure the sugar isn’t scorching the bottom of the pan and that it’s heating evenly. Exact time until your jam sets will depend upon your cooking pot, ingredients and astrological symbol (just kidding), so keep your eyes on the bubbles. They’ll start out small and frothy, get larger and move farther apart. Your jam is done when the bubbles are about the size of dimes and they’re dark and opaque (220 degrees F).
Marisa has a fine description of ways to ensure your jam sets properly. I also like Kaela’s post on making apple scrap pectin on Local Kitchen. (Check comment section on the post for tips on how to actually use it in your jams.)
4. Remove crabapples (or apple skins).
5. Ladle hot jam into hot jars leaving 1/2 to 1/4 inch headspace. Wipe rims clean and seal with two-piece lids. Process for 10 minutes in a boiling waterbath.
You could always skip the waterbath (and put your jars directly in the fridge once they’ve cooled a bit) if boiling even a small stockpot of water seems a preposterous thing to do in the middle of August. If this is the case, don’t bother with new lids; instead, dip into your re-use stash and save the the new ones for when you’re actually sealing shelf-stable jars.
A Note to First Time Jam-Makers
I’m not going to break down all the nitty gritties here because there are a handful of smart, savvy people who’ve written about first timin’ clearly and with style. Please read these fab posts/archives to get a handle on technique and to understand common canning issues:
- Marisa’s Canning 101 archive on Food in Jars
- Audra’s (aka Doris’) Home Canning FAQs and her whole Kitchen Chemistry archive is pretty interesting on Doris and Jilly Cook
- Tigress’ Canning 101 post on Tigress in a Jam
Or you could always read a book (remember those things with paper pages): Eugenia’s, Linda’s sweet and pickle books and the troubleshooting section of the Complete Ball book made the most sense to me as a beginner.
After you read up on things, I highly recommend inviting yourself over to a pal’s house to watch/help out next time they do it. Let me know how it goes!