Useful knot series, part I: Bowline
Knot-tying is one of those essential life skills I managed to miss by not growing up anywhere near water and, apparently, by being a girl scout instead of a boy scout. (Note to all the girl scout troop leaders, girls need knots, too!)
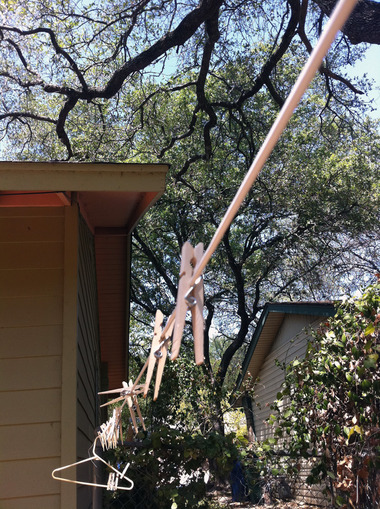
An excellent knot opportunity arose last weekend when I decided to install another clothesline. We’re experiencing a horrible draught right now combined with heat advisories; statewide rolling blackouts are predicted. I decided that hanging the whole laundry load outside and only running the dryer (on air fluff) for 5 minutes to remove that air-dry stiffness is how we’re going to roll, at least so long as it feels like 150 degrees outside (and my clothes dry completely in about 15 minutes).
Every little bit makes a difference.
Luckily for me and my laundry, I stayed with an exceedingly handy boatsman on my last tour through the NYC area. Peter showed me three excellent knots and allowed me to effectively tie up his living room. In the course of securing the radiator to the coffee table, we were able to practice each knot over and over and over again.
Of course, two months later, clothesline in hand, I realized l forgot all my knot-tying knowledge. I think knots are one of those things you need to do everyday for at least a month in order to imprint the motions on your brain. Peter’s blogged tutorial and photos are excellent (he even has video clips!), but if you’re anything like me, the more simply explained the better. Like with other confusing over/under moves (sewing, knitting or crochet), I find it incredibly difficult to read about how to tie knots. I’ll try to break it down into photo slow-mo, but you’re going to have to slow down and pay attention (especially since I’m not sitting in your living room tying up your radiator).
As a matter of sanity (mine and yours), I’m passing this tutorial on to you in portions. Get good at them one at a time.

Bowline, pronounced BOW-lin
Read Peter’s posts for extra photos, diagrams and details about why this knot rocks.
1. Set up your line like so:
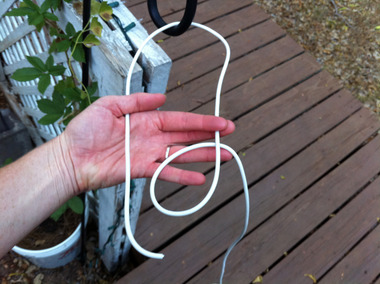
You’ll of course be using two hands, so hold it however you like. Just make sure the long portion of line falls behind the loop.
2. Take your short end and feed it through the loop from the back.

3. Wrap the short end around the back of the long portion of line.

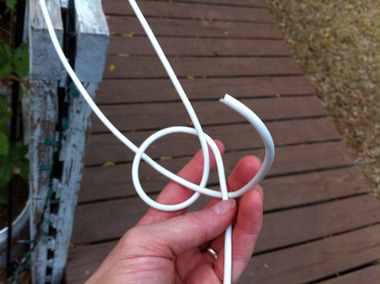
4.Take a deep breath. You’re almost finished. Fold the short end up and feed it back into the loop, this time from the front.

5. Pull on both short and long ends of line to tighten.

If it helps you remember what to do, use a memory-trick sentence (thanks, Therese, for commenting with it!): “The bunny comes OUT of the hole, goes AROUND the tree, and goes BACK into the hole.”
The bowline is a good knot for securing one end of a clothesline. Check out part II, aptly named the clothesline knot, for the best way to string up the other end (or anything that could benefit from an adjustable tensioned line). Part III, two-half hitches is a great alternative to the bowline.