 This crust comes with a mini-GF baking lesson. I’m all for modifying regular gluten recipes straight-up, which means it will usually work out just fine to figure out a suitable gluten-free flour mixture to substitute for the all-purpose gluten flour called for in a recipe.
Pizza dough is different. Most of the regular gluten recipes out there call for olive oil, flour, water and yeast (punctuated with sugar and salt, of course). Not surprisingly, flour is the main event in a good pizza crust. After making damn fine gluten-free yeast doughnuts (the pizza of breakfast food), I remained optimistic that I could create a good crust.
Here are a couple enlightening concepts to keep in mind:
Xanthan gum
Xanthan gum is a thickener, which helps your gluten-free flours develop elasticity (and the suitable structure to produce bread-like objects).
Xanthan gum is made when cultivated bacteria eat the sugars in corn (not the same as high-fructose corn syrup) and in turn produce a cornstarch-like substance that is xanthan gum. Even though you read labels, it can be tricky figuring out if you’re getting GMO corn as part of the deal; NOW and Bob’s Red Mill brands are good brands to buy, both are non-GMO companies.
Xanthan gum is going to cost you some money, but an 8-oz bag lasts for about 6-8 months (maybe more). I do store mine in the fridge as a precaution since our kitchen temperature varies throughout the year. Guar gum is a good thickening alternative if you can’t eat corn products.
Emulsify emulsify emulsify
I just like saying that word, but it actually belongs here because the other big deal in gluten-free recipes is emulsifiers. Harold McGee shares this about emulsifiers in GF baking in my fave food geek book ever, On Food and Cooking:
…emulsifiers stabilize the gas bubbles and slow the diffusion of carbon dioxide from the dough during baking.
What makes an emulsion is eloquently described by Eugenia Bone here; she’s talking about making vinaigrette, but emulsification is the same scientific principle behind what’s going on in your baked goods, too.
There are many ways to create a hospitable emulsifying environment. I happen to favor the olive oil, milk and lemon juice situation. Do some research on emulsifying and come up with your own version if any of these things don’t work for your digestive system.
All this is to say that you’re going to need a few more ingredients than what you’ll see in a traditional gluten pizza crust, but trust me on this, it’s SO worth it when you’re biting into this later in the evening.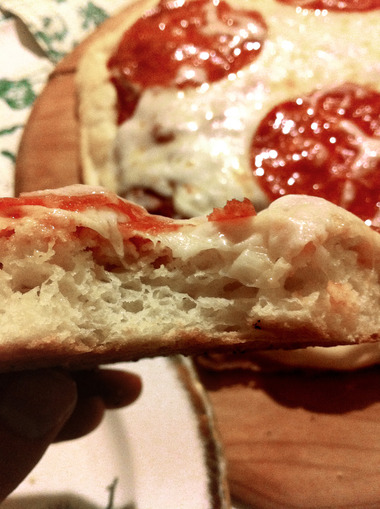
Note about equipment: I haven’t tried making this pizza crust without ‘the equipment’: a pizza stone and a pizza peel. I borrowed the equipment from a friend, a convenient solution if you can’t afford to go out and buy the equipment. I now know that an investment in fancy pizza equipment will be totally worth it if we eat this even once a month. If you’re successful via different equipment, I’d love to hear about it!
Gluten Free Pizza Crust Recipe
makes 1 large, delicious crust
1. Place two eggs on the countertop an hour or so before you start your dough. (Room temp eggs will do a better job emulsifying than just-out-of-the-fridge ones.)
2. In a small bowl, mix 1 tsp sugar with 2-1/4 tsp (or 1 packet) active dry yeast and add 1/4 cup warm water (110 degrees F). Set this aside and let it puff for 10 minutes.
3. In a large mixing bowl combine your flours:
- 1 cup finely-milled white rice flour (the 89-cent, 1-lb bag I bought at the Asian market is by far the finest milled rice flour I’ve ever seen)
- 1/2 cup sweet rice flour (of note, I found sweet rice flour for 99 cents/pound at the Asian market)
- 1/2 cup tapioca or arrowroot starch
- 1/4 cup potato starch
- 1 tsp xanthan gum
and then add the other dry ingredients:
- 1 Tbs sugar
- 1 tsp salt
4. Combine the following with the paddle attachment in the bowl of your stand mixer (a hand mixer would probably do fine here since the batter is smoother and less dense than a regular bread). I bet you could also do this by hand (no mixing technology required).
- 2 room temp eggs
- 2 Tbs olive oil
- 1/2 cup milk (I used whole)
- 2 tsp lemon juice
- 1 tsp cider vinegar
5. Add half of your flour/dry ingredient mix to the wet ingredients and gradually increase to med-low speed. Then add the yeast mixture. Once that’s mixed in, add the other half of your dry ingredients. The consistency of the batter should be like a soft cake icing. Add warm water (110 degrees F) a tablespoon at a time if it’s dryer and denser; if it’s too wet, then add more rice flour. Mix on medium high for 5-7 minutes to ensure proper emulsion!
6. Grease a piece of parchment paper large enough to hold your pizza. 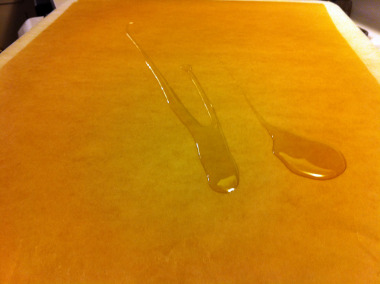
Dump out your batter on the greased parchment paper (it won’t be firm like a regular dough ball, but it shouldn’t ooze everywhere, modify as instructed in step 5 if either of these are the case) and use a firm rubber or plastic spatula to spread it into a crust-like shape. The trick here is to think cake icing, and use similar motions otherwise you’ll get frustrated at the stickiness. Broad sweeping strokes, patience and the knowledge that you’re about to eat the most gluten-esque pizza you’ve ever had should carry you through just fine.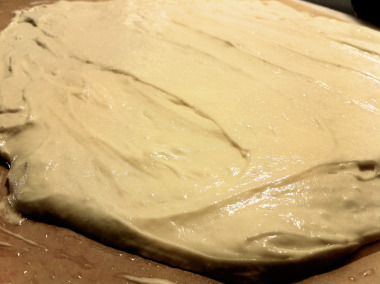
7. Slide a cookie sheet (or something flat and large enough to hold your pizza) under the parchment paper with your crust spread and let it rise in the cold oven for 45 minutes. This is a good time to make your sauce or check your email. Making crust for the first time can be exasperating, gluten-free or not, so give yourself a pass on the everything-homemade concept until you feel more confident. Buying a $4 jar of sauce is nothing to be ashamed of in this case!
After 45 minutes it will look like this: Thanks yeast.8. Remove your dough spread-sheet (hee hee) from the oven, place the stone in bottom rack of the oven if it’s not there already, and preheat to 475 degrees F. Use a fork and poke holes throughout the interior of the crust. Once you’re at temp, use your pizza peel and slide the whole parchment paper sheet onto the stone and pre-bake the crust for 4 minutes.
9. [OPTIONAL] I like the cornmeal-bottomed crust, so I did it. Pull your pre-baked crust sheet off the peel and sprinkle about a tablespoon’s worth of cornmeal, yellow grits or polenta directly onto the peel. In a swift move pull the parchment out from under your pre-baked crust and transfer the crust onto the cornmeal on the peel.
If you’re not using cornmeal, just pull the parchment paper off the crust and transfer it to the peel.
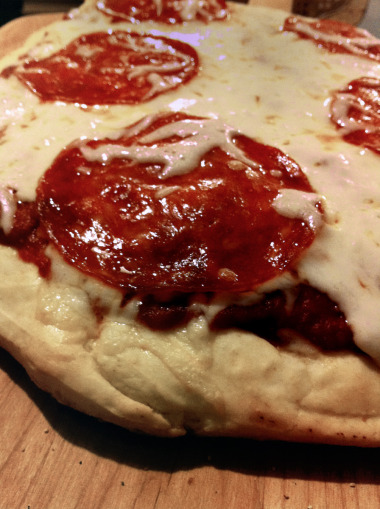
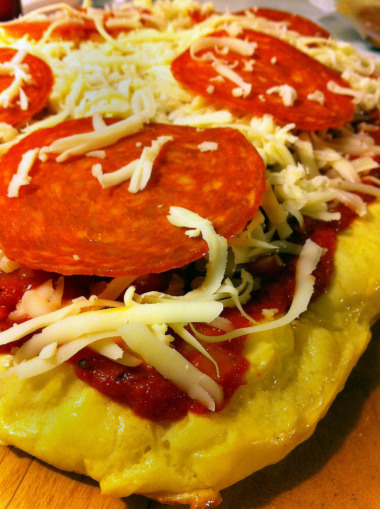
10. Brush crust with olive oil and then spread your pizza sauce. Add desired toppings.
11. In a swift move of hand-to-peel combat action, slide your pizza directly onto the baking stone and bake for about 5 minutes, or until your toppings are melty and nice-looking. Getting your pizza off the stone when it’s done can be tricky, but be quick and intentional about it and you’ll be fine. It sort of reminds me of flipping an omelet (even though you’re not actually flipping your pizza over) with the swift, scooping action.
12. Try not to die of over-excitement at what you’ve created.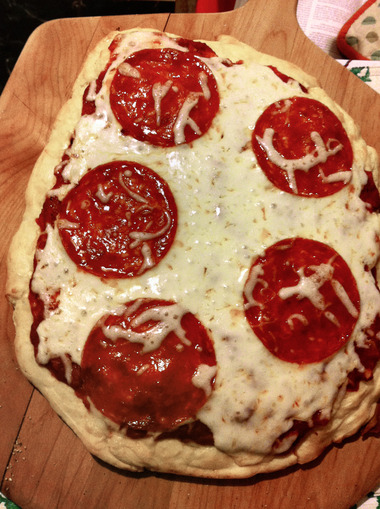
A special thanks to Jess at ATX Gluten-Free for hosting the GF Pizza Fest 2011. She inspired me to get this post up in time to make the round-up next week. Check out her blog for cool toppings ideas.