
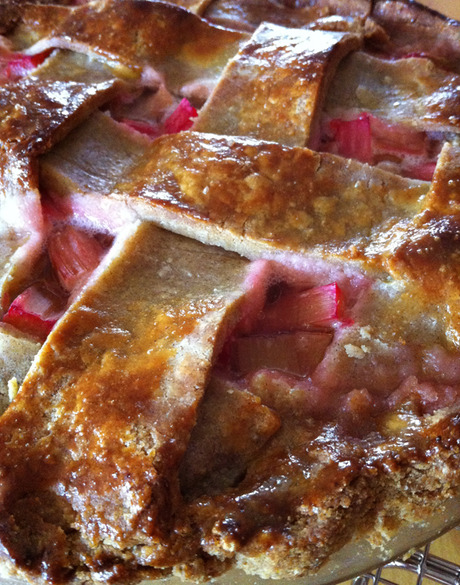
You might think a lattice or covered crust pie is out of the question for gluten-free folks. Well, think again.
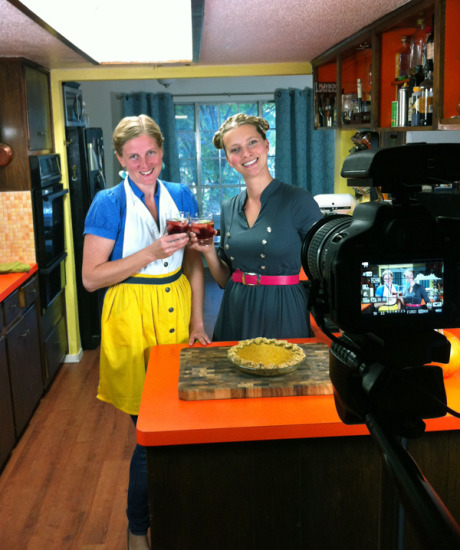
As with all gluten-free baking projects, you just need some help getting things gummy and then emulsifying. This is my tried and true (and award-winning!) pie crust, and I’m pleased to share it with you to coincide with a video I did recently with my friend Hilah over at Hilah Cooking.
Pie is an experience. You may have quite the experience your first couple times making it, but after you get a feel for what needs to happen, it’ll hopefully become more of a positive experience. You’ll be happier with yourself if you prepare the crust a day in advance of filling and baking it, hence I wrote this as a two-day project.
HGGH Gluten-Free Pie Crust
yields one large (9 or 13” pan) bottom crust, make an additional half of the recipe if you want to make a covered or lattice pie
Day One: Prepare the crust
1. Spread two large pieces (at least 18” long) of parchment paper out and set aside on a clean workspace.
2. Mix together these ingredients in a large mixing bowl:
- 1 cup white rice flour (if you can, get the finely milled stuff at the Asian market)
- 1/2 cup potato starch
- 1/4 cup buckwheat flour
- 1/4 cup sweet rice flour
- 1/2 tsp xanthan gum
(OR use 2 cups premade GF flour mix)
3. Add to flour:
- 2 teaspoons granulated sugar
- 1/2 teaspoon salt (I use finely ground sea salt)
4. Cut 1 stick of cold butter (or 8 tablespoons) into 1/2-inch slices and drop them into the dry mix. Use pastry cutter or a fork to incorporate the dry mix and butter. The mix will still be flour-y and dry, but the largest butter bits should be about pea-sized.
5. Whisk together in a small bowl:
- 1 large egg
- 1 Tbs apple cider vinegar
Incorporate egg mixture into the dry crumbles with a fork until all your crumbles are coated (there’ll still be lots of dry stuff, just slightly darker-hued).
6. Add a few ice cubes to a 1-cup measure full of water. Add 2 Tbs ice-water to the flour mixture and press with your hands to incorporate. It might stick to your hands, but just scrape it off and do your best. Assess the dry/wet situation and add up to 2 more Tbs ice water to finish adhering your dough. You want ‘stays-together-when-pressed’ but not sticky and gooey, nor the other extreme of too dry and crumbly.
Dump the now-balled-up dough and any crumbles from the bowl onto the waiting parchment paper.
7. Using the heels of your hands, swiftly smash the dough down to form a flat circle. Use your fingers to connect and smooth the cracks that form around the edges of the circle.
Place the top piece of parchment over the dough, fold the edges of paper to fit the disc into an airtight freezer bag or onto a dinner plate and covered with cling wrap. Refrigerate overnight, or freeze for at least 1 hour.
Gluten-full pie crusts need to be refrigerated to relax the flour and keep it from developing its gluten properties (not an issue for GF), but the fridge break prior to baking also keeps the fat from melting into the surrounding flours before you’re ready to bake it.
Hey, you can watch our video while you’re waiting [click photo to watch video]:
_________________________________________________________
Day Two: Fill & Bake
(time requirements: 1 hour prep, 50 min bake, 3-4 hours cool)
1. Remove your dough disc from the fridge. Preheat oven to 400° F*
2. Prepare your filling. If your filling is already prepared, then make a cup of tea and chill out for 20 minutes to let the dough come to room temp.
3. Roll out your dough keeping the parchment lining on both sides. [See video!] Yes, it will crack as you roll from the center into a wider and flatter circle. Take your pin and roll along the edges of your circle, clock-wise, to help close those cracks (use your fingers if need be). I have yet to make a perfect circle in my rolling adventures, but do your best to create a circle-like object with a 13”-ish diameter.
4. Slide a cutting board or flat cookie sheet under your rolled out parchment-sandwiched circle, remove top sheet of parchment, and gently place your 9” pie pan upside-down on the dough.
Make a swift, confident flip of your pan and cookie sheet deal (over the counter!) and the crust should sort of droop into pan. Remove the last piece of parchment and assist the dough in sagging down snugly in the pie pan. Don’t worry if the edges crumble off. Just re-attach them as you firm and shape the edge of the crust. I followed along with the pretty pictures in Joy of Cooking for a fluted rim. Place bottom crust in the fridge if you’re making a lattice or covered crust pie.
LATTICE: To make a lattice, roll out dough the same way as you did the bottom crust so the dough is at least as wide as your pie plate. Use a butter knife to cut vertical strips as wide as you prefer, wider is easier. You might need to stick the flattened and stripped dough back into the refrigerator on a cookie sheet for a moment if it got too soft during the rolling/cutting in your hot little kitchen. You’re better off working with cold strips than gooey ones, just sayin’.
Once the dough is cooled again, slide your knife under every other strip and place those strips perpendicular to the other strips. Weave the lattice directly onto the parchment paper bottom by lifting portions of the existing strips gently and placing the top pieces under or over them. After you weave your lattice, set the parchment paper right next to the pie, maybe between you and the pie. Do a fast flip of the parchment like you’re turning the page of a book. It’s like flipping an omelet, no room for hesitation. Adjust any portions that didn’t make the flip intact and cinch the top and bottom crust with your fingers. [I know this could use another video, maybe I’ll make that one next!]
COVERED CRUST: Roll out dough the same way as you did the bottom crust so the dough is at least as wide as your pie plate. Unpeel top layer of parchment and either use the cutting board method to flip or just do a fast flip, book-page turn like the lattice people above. Cinch and form edges of the crust and cut vents/glaze as desired.
5. Brush the unbaked crust with an egg yolk (or an egg white; I like the golden color of the yolk, but it’s up to you) and fill it with whatever you have on hand. If the recipe calls for a pre-bake or warming of the crust, go ahead and prick around the interior of the crust with a fork so it doesn’t puff up.
 Baking time/temp is really going to depend on your filling and how you top it. Generally for a lattice or streusel covered pie, bake for 30 minutes at 400° F, cover with a disc of aluminum foil and bake for an additional 20 minutes or until the goo bubbles up and oozes through the crumbles. Generally, for a covered pie, you’ll want to bake for 30 min at 425° F and then reduce heat to 350° F and stick a cookie sheet underneath the pie plate and bake for an additional 30-45 min.
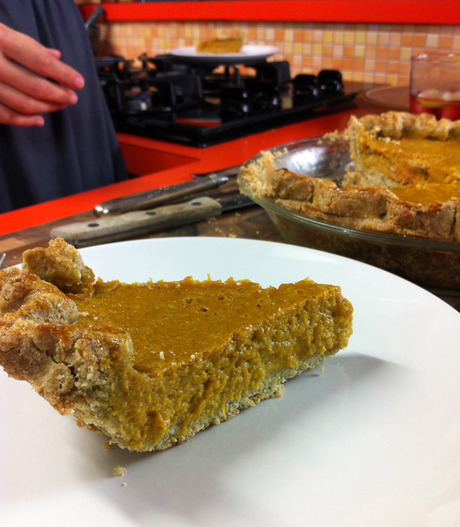
Oh, one more thing about pie, yes, you have to let your pie cool before cutting it, otherwise the filling won’t firm up properly…
*Alternately, use your fave pie recipe’s temp/time directives for this crust.
