
Marshmallows have intimidated me for a really long time. I don’t know why. I make more complex things regularly without trepidation.
My fears probably have something to do with reading and translating a recipe into you-can-do-this terms. The recipes out there are all pretty much the same when it comes to measurements and methods. Well, I got over it, and my first go round with vanilla bean marshmallows had me standing there scratching my head after all was said and done with a “this is it?” kind of feeling. They’re not that hard people.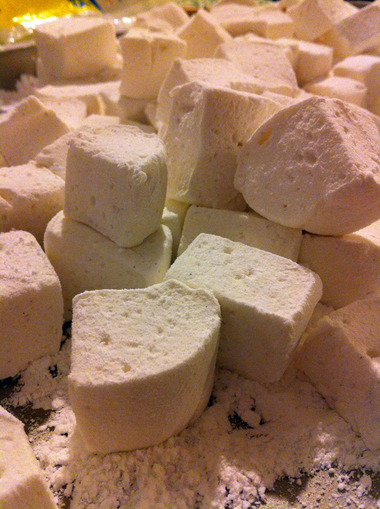 Vanilla bean marshmallowsAfter a successful round one. I decided to go for the glory and make another batch. I also happen to be low on funds for Christmas presents, so homemade fanciness from my kitchen will be my only offering this year. Since we’re making hot cocoa packets for all our friends and fam, a peppermint marshmallow seemed rather appropriate as an accompaniment to that.
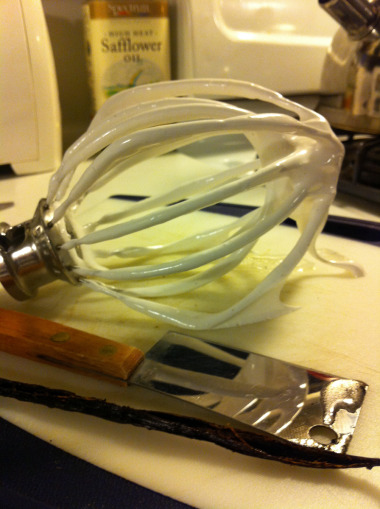 The equipment was out, why not make two batches?The only problem with my idea was that I didn’t have peppermint extract, which seemed essential to crafting a peppermint marshmallow recipe. I had just returned from a three-store corn syrup mission on my bike. No way was I going out again. Giving up on mint marshmallows was not on my agenda either, so I pulled out two peppermint tea bags.
Why on only my second attempt I felt brazen enough to experiment, who knows? [Standing on kitchen counter, beating on chest with a whisk and a spatula] I didn’t even have the money to go re-buy the gelatin and mint extract in the event of failure. Living on the edge over here, as usual…
Well they turned out wonderfully. And now I think you might be able to squeeze them in before Santa shows up. They’re best as an overnight recipe. (So, basically, make them tonight if you want to enjoy them in hot chocolate on Christmas day.)
Note (before you buy the ingredients): You’re going to need some sort of mixing technology for these. A stand mixer is ideal, a hand mixer will do (but proceed at your mixer’s own risk and read Autumn’s post first).
Homemade Peppermint Marshmallows
yields a whole lot of marshmallows (or less, depending on your pan size)
1. Brew 2 bags of plain peppermint tea in 3/4 cup boiling water. Do this first thing so you can cool it down enough to activate the gelatin properly. If you’re making plain marshmallows, skip this step because you’ll be using water instead of tea. Dropping a few ice cubes to cool it down for the next step won’t affect the strength of the tea too much.
2. Combine 3 packets unflavored gelatin (I used Knox) and 1/2 cup cold strong peppermint tea in the bowl in which you’ll be doing your mixing. In my case, it’s in the bowl of my stand mixer. Let sit while you prepare your sugars. Don’t smell the gelatin or you won’t want to eat your marshmallows. The tannery smell does go away, I promise.
3. Combine in a medium-sized saucepan over medium heat
- 2 cups granulated sugar
- 2/3 cup Karo corn syrup, the light-colored version—not “lite” as in diet—as opposed to the dark (Brand X corn syrup will likely contain high fructose corn syrup, and Karo does not)
- 1/4 cup of your strong peppermint tea
- (optional) 1 Tbs finely crushed up candy canes
Stir to dissolve sugar granules. Bring to a rolling boil for 1 minute. (Using a big enough saucepan is key here, otherwise the bubbles will threaten to poof up and over the rim.)
4. Remove boiling sugars from heat and carefully pour/scrape it into your gelatin mixture. Add 1/4 tsp salt.
5. Using the whisk attachment on your mixer, start the mixing on low and gradually increase it to med-high. It’ll be pretty splashy at first so be careful. Mix for 12 minutes, or until the mixture resembles the consistency of creamy fluff (you know, the stuff they sell in jars near the Rice Krispies).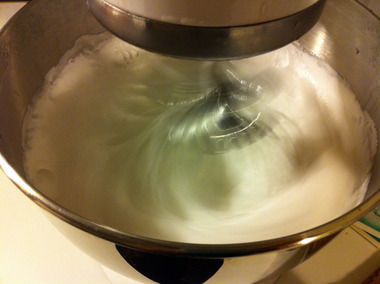 Almost there…6. While your mixture mixes, prepare your molding pan. I used a 9” x 13” Pyrex dish and was pleased with the size/output of my marshmallows. It really doesn’t matter what size/shape pan you use, so long as it has high enough sides for your ‘mallows to form up against. For your first couple attempts, I’d advise lining the pan with a sheet of saran wrap and greasing it really well with a discreet oil (safflower, canola or vegetable). You won’t be sorry you did this when you’re trying to extract your ‘mallow sheet the next day. You’d be smart to grease everything else that will encounter the gooey sugary fluff.
 Hands, spatula, cling wrap greased: check!7. As the mixing finishes, turn it down to low and add 1 Tbs pure vanilla extract (or should you happen to have this in your pantry: 1 Tbs peppermint extract). If you keep it on high speed, the extract will fly out of the sides of your mixer.
8. Using your greased spatula, guide the fluffy white stuff into your prepared pan to make an even sheet. Smooth it out with your spatula as much as possible. It’ll start to solidify, so this step gets considerably more difficult if you dilly dally. Cover pan with a sheet of cling wrap (grease that, too, just in case it falls in and touches the ‘mallows) and let sit in a cool, dry place for 4-5 hours or, better yet, overnight if you can wait it out.
The next day (or much later that day)…
9. Spread about 1 cup powdered sugar on a walled cookie sheet (not the flat, zero-edge kind). No need to measure. Your goal is to coat the hell out of the marshmallows. Use as much or as little as it takes to do that.
Make sure the sugar is mostly lining the bottom of the cookie sheet before you plop your ‘mallow sheet onto it (or it’ll stick to the cookie sheet and possibly tear!).
10. Be prepared to coat everything and everyone in a 15-foot radius with powdery white. If you’re expecting it to turn out otherwise, you’ll be frustrated.
Use your hands to coat the sheet with powdered sugar until it’s no longer sticky anywhere and then use kitchen scissors and slice off a row to begin shaping your marshmallows.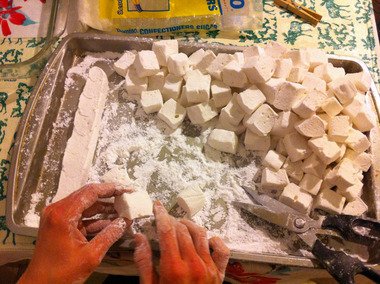
Keep rubbing your scissors down with powdered sugar and be sure to re-coat the newly exposed sticky sides of the marshmallow sheet with sugar. As you dice the rows into individual marshmallows, roll the sticky sides in powdered sugar. Make sure there are no sticky, exposed sides.
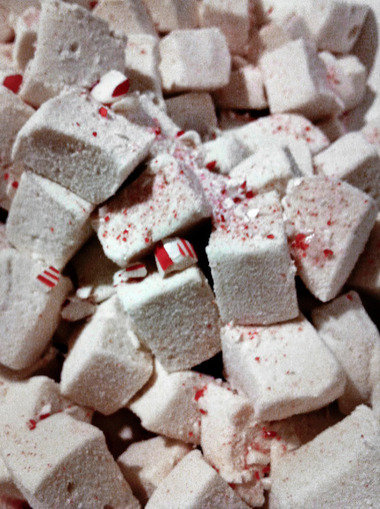
11. Dust off any excess powdered sugar and package in airtight containers/bags. I sprinkled the finished product with mashed up candy canes, which I’d only recommend doing upon serving. The candy canes leached moisture from the marshmallows and created a bleedy, gooey, coating on my pretty marshmallows after I let them sit ‘dressed’ overnight. If you want to package these with hot cocoa or something like that, then include a little packet of crushed candy cane for the recipient to drizzle over the top.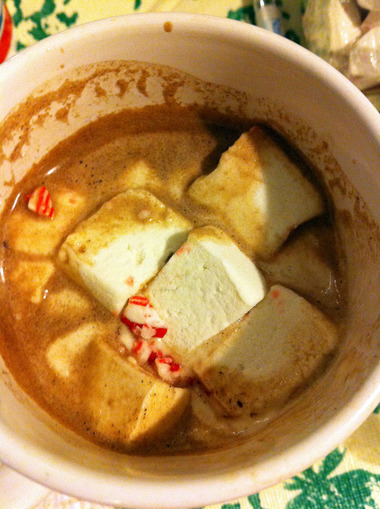 Happy holidays to all and to all a powdered-sugar-filled night!