
Subtitled: Creative things to do with preserver’s trash
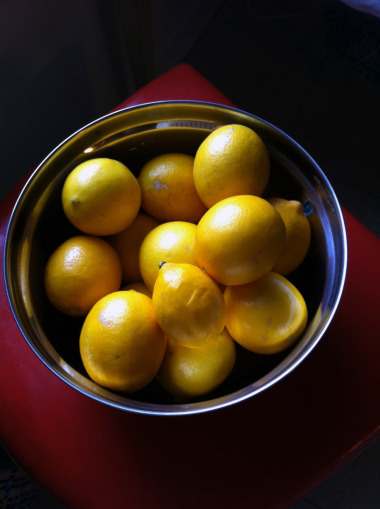
As I made Eugenia’s preserved lemons recipe yesterday (in this book, and soon also featured in my own book, out April of this year!), I ended up with a little more than a cup of leftover Meyer lemon juice (my local, organic Meyers were big!) and six gorgeous rind halves.
And, as usual, I asked myself “What would Eugenia do with these components, WWEBD?” [By the way, I’m not creepy, I just think Eugenia Bone is a smart kitchen ecologist. She’s half depression-era-granny and half culinary-genius; she taught me a ton when I hung out in her gorgeous SoHo kitchen last year.]
Back to my cutting board. The peels were were too soft and fragrant to throw out. The juice obviously had a destination in a vodka cocktail later that evening. Meyer lemon cocktails…Mmmm. Then it hit me, limoncello!
I must be honest; until looking it up last night I had no idea what limoncello really was (and how easily I could actually make it). Thankfully, I had just the place to turn since the lovely folks at Harvard Common Press sent me a sweet little prize awhile back:
 Fun, low-stress infusing guide[Aside: Isn’t it nice to have an actual book to consult? Maybe you’re an internet-only kind of person, but new ventures always seem less daunting to me when there’s a good old-fashioned book nearby.]
You can imagine my surprise and excitement to find out that not only did I have the exact components I needed for infusing a citrus liqueur (the rinds), but I wouldn’t even need to go to the store in two weeks when that part is finished.
Why hadn’t I done this sooner?
Boozy fruit is supposed to be the new thing, circa late summer 2010. The easy way to preserve stuff, no hot water, no sanitary jar sealing rules. Well, I admit, getting fruit drunk has eluded me until yesterday because it seemed like I needed things (like grain alcohol) that I hadn’t any idea how to get, or like infusing/fermenting vats that I can’t afford right now, plus lots of time for the infusing to take place.
I’m not much of a liquor store go’er and grain alcohol still eludes me, even though I know it’s just Everclear. I like recipes that call for vodka. I know right where to find that, and we usually always have some on hand. Rum gives me a headache no matter how hard I try to ignore memory. My point is, choose a recipe that is based on something you can afford, access and actually like to drink.
While it’s true that you’re not going to ‘whip up’ a batch of limoncello or citrus liqueur in less than a month, it’s actually great for busy people. A few concentrated efforts spread out over time, and the rest of the time you conduct business as usual, hiding your infusions in the back of the cabinet until it’s time to stir and add a sugar syrup. Not all recipes will be the same, but don’t give up on the whole idea (like I did) because one looks too hard or involved.
 I’ve been obsessed with Meyers since I discovered them last year.Meyer Limoncello
recipe modified from limoncello and two other citrus liqueur recipes in Luscious Liqueurs
takes 4 weeks, yields about a quart of liqueur
1. Halve and juice 4 or 5 organic Meyer lemons* (more if they’re smaller, less if they’re really large). Make something with the juice, like fancy lemonade, spiked or not) or hopefully you’re making another recipe with the Meyers that doesn’t call for the rinds.
*If you’re making liqueur, marmalade, preserved lemons, or anything that calls for rinds, it’s really important to make sure your citrus is organic since the rind is the place where pesticides accumulate in most conventionally grown produce.
2. Scrape as much pith out of the rinds as possible. I had a few good stem ends on hand too, so I de-pithed those as best I could.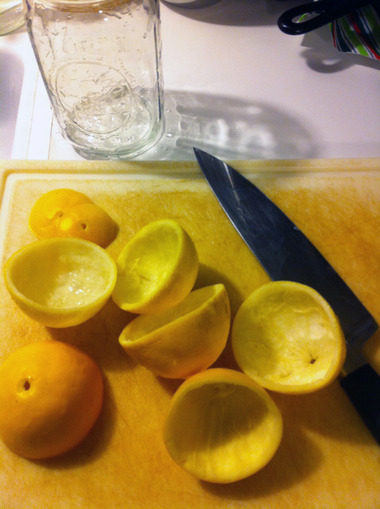 Don’t pitch those rinds!3. Slice the rind halves each into about four long strips and place them into a clean, glass quart jar.
4. Add 2 cups high proof vodka (100 proof) and make sure all the rinds are for the most part submerged. Add clean, two-part lid and band (or anything that will ensure an airtight seal). Label jar directly with a sharpie indicating the contents and the date two weeks from now. (When you’re ready for the next step, you can remove that sharpie ink from the glass with some rubbing alcohol or a dot of your vodka.)
5. Hide your infusing rinds in a cabinet (away from light and heat) and wait it out! Give the jar a gentle swirl every few days to ensure the rinds are infusing and distributed evenly.
Two weeks later…
6. Make a simple syrup by dissolving 1.5 cups sugar in 2 cups water in a small saucepan. Bring to a boil, then reduce heat and keep at a low boil for 5 min. Remove from heat and let cool to room temp for about an hour. This ratio will make a tad more than 2 cups. Save any leftovers in a glass jar in the fridge for other uses.
7. Add 2 cups simple syrup to your rind-infused vodka, stir well and seal it up again for two weeks. Re-sharpie the date two weeks from now onto the jar. And, as before, swirl the mixture every few days to keep things evenly distributed.
Two weeks later…
8. Strain liqueur through two pieces of cheesecloth, two separate times. Place your strained liqueur in a clean glass jar or into a few smaller bottles and store in the freezer so it’s chilled to perfection when you’re ready to sip!