
As demo’ed on the book tour!
For those of you who joined me in Concord MA, Philadelphia PA, Houston TX & Brooklyn NY this shall serve as a refresher session. For everyone else, I’ve found that managing all the things we do in and around the house can be a sort of stressful task.
Why not pull out some kindergarten technology? Brads are a useful, low-tech solution to the too-much-to-do and not-enough-time-to-do-it problem.
This project was directly inspired by our good friend Madeline, who has a handful of roommates. We were house- and dog-sitting over the winter and I was so charmed by her approach to delegating chores. This cute wheel hangs in her kitchen.

The basic top-wheel set-up is great for households with lots of moving parts, roommates, children, etc.
Here’s a little notecard with instructions on how to make one at home. I’ve found clean, tin coffee containers or canned tomatoes make a great stencil for the top wheel.
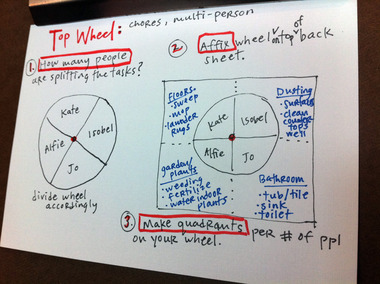
1. Figure out how many people are on your wheel.
2. Center and affix your wheel on top of back sheet.
3. Divide the back sheet up by as many quadrants as you have people on the wheel.
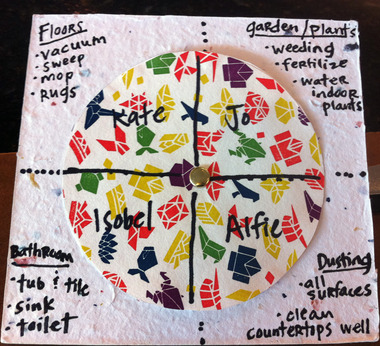
Here’s our house’s top-wheel chore wheel, which also includes our pets in the action. Alfie the cat is really good at dusting.
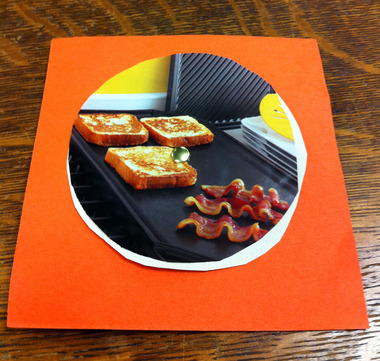
A crafty attendee at my Houston signing came up with a breakfast wheel for her daughter. She hadn’t filled in the breakfast option quadrants yet, but she planned to use this set-up for helping her daughter, who’s chronically slow at deciding what to eat for breakfast, make a hands-on decision.
I bet she plans to just draw an arrow (or an empty plate!) on the top-wheel that her daughter could just rotate and point to whatever option sounds best.
The other version of this project, the bottom-wheel set-up, can be used for single folks’ chores or for hobbies you’d like to focus on during the week, or month. The bottom-wheel allows you to only see one thing at a time, which is great if you’re an easilly derailed multi-tasker like me.
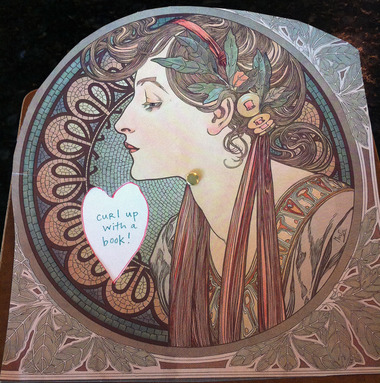
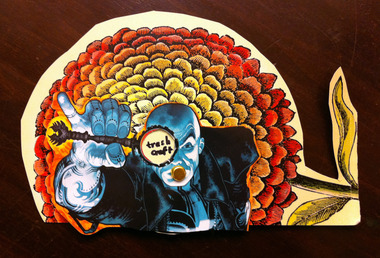
For this version, you cut a hole (whatever shape you like!) in the top image and then make corresponding shaped bubbles in the back wheel. I made a heart-shaped window which corresponds with a bunch of fun things I like to do. Records (45’s) make for excellent back-wheel stencils.
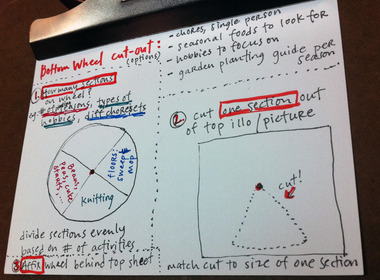
This version can be slightly more advanced, but I have faith in you to figure it out. If you’re going beyond the pie shape shown in this little how-to notecard, then it’s best to switch up the order a bit:
1. Cut the shape out of your top image.
2. Affix your blank, not sectioned back wheel first and trace the cut-out window onto the back wheel. That way you can fit as many things as possible on the back wheel and they line-up perfectly with each rotation.
3. Fill in each space on the back wheel.
Consider a back-wheel project for things you might only want to focus on for a certain time period like what veggies are in season at the market, what foods or flowers should be planted or harvested during this season, what chores you will do during the week. Make additional back wheels to switch it up after awhile.
Here are a few of the wheels made by the awesome folks who turned up in Brooklyn last night. If you make a wheel, please email me a photo and I’ll add it to this post!
Liz’s mini, inner wheel turns to reveal the fun thing she’ll focus on for the week!
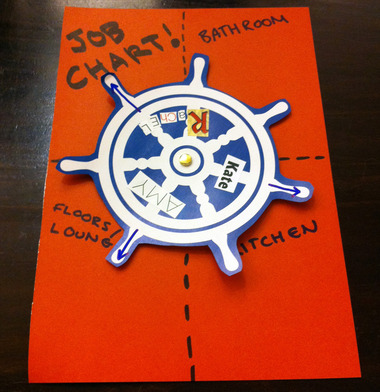
Kate’s at the helm of her household’s tasks with this fun one!
What a fine idea! With only two roomies, add a ‘Mystery’ category that will rotate along to absorb extra tasks and not give each roomie too much to do each week. Gotta love the “fun snack” task, too!
