Defrosting on the fly

The last hip trick was all about freezing stuff, so this week’s post will be about unfreezing. Ah, defrosting. Leisurely defrosting is the kind of thing people who plan ahead do. To be one of those kinds of kitchen people, I strive. 

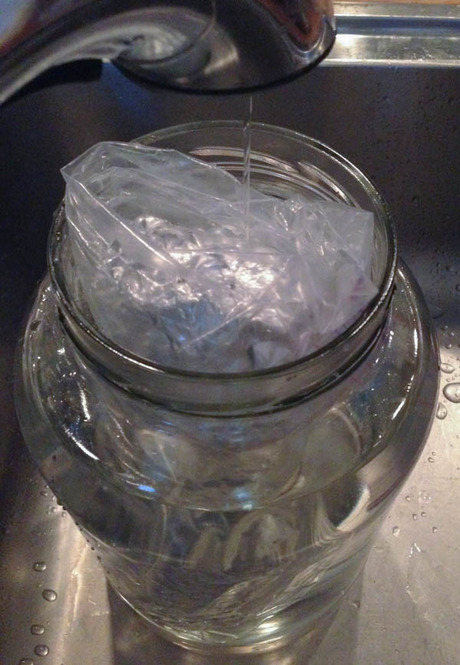
The plan-ahead people will usually safely defrost by just putting something in the fridge and cooking it the next day when it’s fully defrosted. Well, for the non-plan-ahead types, running something under a tiny stream of cold water (for a maximum of 2 hours) is also an acceptable way to defrost, and quickly at that. However, I don’t feel so great about letting all that water trickle down the drain.

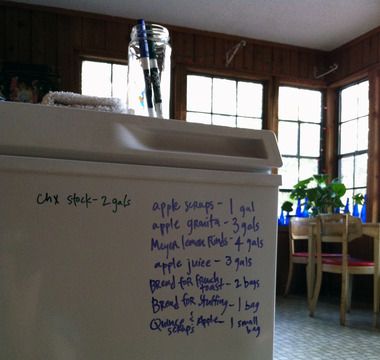
I used a gallon jar (another great way to use them around the house) to capture batches of water as we defrosted some fish filets last night. Yes, you have to periodically monitor the progress of the jar, but your houseplants (or trees or garden) will be so happy you did.

Eliminating Freezer Burn

This freezing trick comes as an addendum to a great tip I learned from my friend Kim O’Donnel, who was in town teaching classes last weekend. Enjoy this two-for-one hip trick deal!

I inherited from a market demo an excess quart basket of overripe tomato seconds (the not-pretty, but still great eating variety), and with these tomatoes I made tomato paste. Kim said to peel and seed then puree the tomatoes, line a rimmed baking sheet with foil and bake in a low oven (200) for an hour or two until the water evaporates and you’re left with tomato paste. 

Store this or any freezer-bound goods in a straight sided mason jar (to allow ice crystals to evenly expand upward and prevent jar breakage) and top with a little piece of foil to eliminate air from coming into contact with the surface of your food, thus cutting down the odds of freezer burn. (p.s. Yes, this is precisely a reiteration of this very hip trick, but less the plastic touching your food, score!)

Update: A couple hip readers mentioned that the foil might leach aluminum into acidic foods (like tomatoes!) so maybe a small round of parchment paper would do best? The trick would be to cut it just right so it sits completely inside the jar rim and fits on top of the food without bubbling up and causing a pocket of air between food and parchment.

Freezing homemade bread


People buy bread from the store primarily because it’s easy to store. (I say that because once you get on a roll with making a loaf weekly, the work of making homemade bread sort of goes away.) Well, now you can keep your loaf around for the week without biting into a piece of driftwood by the end of the week.

Slice your loaf once it’s completely cool (yes, I mean really cool, not warm). Cut squares out of a larger piece of parchment paper and layer them in between each slice of bread in a brand new, gallon-sized freezer bag. Remove air with handy vacuum seal trick (optional), and stash in the freezer. Pull out a slice or two and just defrost them with a short toasting as needed. You can re-use your parchment squares and your freezer bag (until you don’t get a good seal on the bag any longer), just keep the empty bag with parchment in the freezer between uses.

Homegrown jamming: preserving tiny amounts of produce

If your strawberry plants are anything like mine, you’re lucky to get one or possibly (spectacularly) two berries every few days. Hardly a jam-worthy lot. Hardly even an ice cream toppings for two lot.

Well, if you have a bit of perseverance and a freezer, you can make a small jar of your homegrown berry jam. Freeze your berries little by little by following the how-to in this post on freezing berries for future jamming. Wait for your next “harvest” and repeat! When you have a half pound’s worth stashed in your freezer bag, make half of this recipe and enjoy a half-pint of your homegrown jam.

Freezing muffins

Muffins are an easy make-ahead convenience item. They freeze beautifully, but up until now, I’ve had a hard time defrosting them without encountering cold spots in the middle (or needing to saw away at a rock-hard, still-frozen muffin).

I’m not sure why it’s taken me so long to come up with this solution, alas necessity strikes again! Slice your completely-cooled muffins in half, separating top from bottom, and place in an air-tight freezer bag. When you pull out two frozen halves, they’ll toast up perfectly and be consistently warm throughout. (Plus, this provides the perfect palette for a jam or butter inside your muffin!)